Lighting on your layout

Light up
your own world

Evening in townhouse windows, street lamps and a single flash from a welder. Set up lighting that gives your layout a rhythm and shows the story you want to tell.

Buildings, streets and lighting effects
Estate after darkModel scene

Window lights and street lamps create an evening scene.

What you can do

Every light
has a purpose

Start with a single point. Then combine building, street and detail lighting into one show.

Brightness under control

Set steady light and brightness on the appropriate outputs. Distinguish gentle indoor lighting from street lighting.

Smooth transitions

Fade lighting points in and out. Plan a gentle transition from day to evening.

Colour and zones

Combine RGB or RGBW channels into groups and zones, according to your controller's capabilities.

Effects with character

In PRO, use pulsing, strobe, welding or faulty bulb effects.

A coordinated show

In PRO, combine lighting with movement, sound and successive scene actions.

Your own panel

Name outputs after buildings and places. Control lighting with the buttons on your panel.

Ideas for your project

How will you use it
on your layout?

01

Evening in the neighbourhood

Street lamps, shop windows and apartment windows light up one after another. Different brightness levels help distinguish streets from interiors.

02

Workshop by the tracks

A brief welding effect appears against steady lighting. In PRO, you can include it in a longer scene.

03

Property development presentation

Highlight a selected building, unit or layout zone. Panel buttons guide the viewer through the project.

Devices and connections

From setting
to light

The computer sends settings to the controller. The PWM module controls the connected lighting points. Raspberry Pi also has diagrams for direct connection via GPIO and I²C.

Signal flowLight / 04 stages
  1. 01Control

    App

    Panel and settings

  2. 02Controller

    Arduino Uno

    USB connection

  3. 03Outputs

    PCA9685

    PWM outputs

  4. 04On the layout

    Lighting

    LEDs on the layout

What to prepare

Go to diagrams

Arduino or Raspberry Pi

Choose the diagram for your system. Pin labels and logic levels depend on the board.

PCA9685

PWM output module. In the current diagram, the LED uses a resistor built into the board.

LEDs, power and wires

Choose components for the number of channels, voltage and load. Other light sources may require a suitable output driver.

Additions for your project

Expand your layout

Hardware, effects and files from the catalogue. Match them to the devices and scenes you are working on.

Coming soon
Hardware and controllers

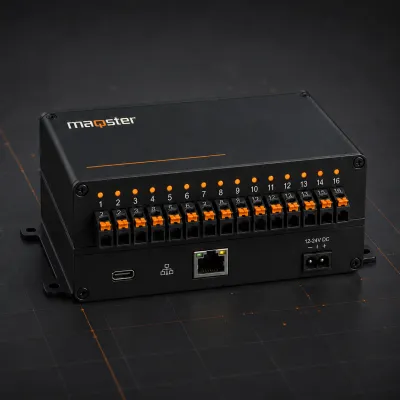
Input and output controller

16 configurable I/O channels for layout automation.

View product Coming soon

Lighting that guides visitors through an exhibition

For museums and exhibitions

Example scenario

On a historical city model, separate buttons could illuminate the market square, a workshop and the station. A short scene shows the transition from day to evening while narration identifies the area being lit. This is a scenario to plan around the story, number of lighting points and viewing conditions in the gallery.

What to prepare

Prepare a plan of lighting points, their circuit groups, voltages and expected loads. The installation needs a control computer, a compatible controller, suitable outputs and power supplies. For an existing layout, connection photographs and documentation help. Test one circuit before building the complete sequence.

Scope and limits

A PWM module cannot power every type of lamp. Strips, fixtures and higher loads may need a separate driver stage. The power-on behaviour and return to an idle state also need to be defined. Model lighting is designed separately from the building’s emergency lighting installation.

Questions before implementation

Can lighting already fitted to the model be reused?

This can be assessed after checking voltages, current consumption and the available control method. An otherwise working installation may need an additional interface, different circuit groups or documented wiring.

Does every lighting zone need its own channel?

A separate channel is needed wherever lights must behave independently. Points that always operate together can be considered as one circuit, subject to its load and the capabilities of the selected controller.

An implementation can be scoped and quoted now. The standalone Maqster app has not yet launched.

Enlarged view. On a small screen, scroll the diagram horizontally.

FREE · NEWSLETTER AND LAUNCH

We will let you know when
the app is ready

Sign up for the newsletter. After launch, we will email you a link to an account where you can download the app.

LET'S TALK ABOUT PRO

Your idea
PRO possibilities

Tell us about your model. We will help you choose the right application features and work out where to start.

  • Scenes and device control
  • Automation and integrations
  • A conversation about your project
maqsterLight. Motion. Sound.

We will reply to the email address you provide. Privacy policy.

Contact

Discuss control for your model

Tell us what you would like to do with your model layout. After a consultation, we will prepare a complete system tailored to your project.

  • Device and scene plan
  • Local control and configuration backups
  • Controllers, protocols and integrations